Wood Stove Clearances – Installing it Safely
Please note: The following document is meant as an introduction and discussion of certain issues relating to Wood Stove installation. Please consult your owners manual, professional installer and building official for more specific information related to your particular installation.
What about Pellet and Gas stoves?
The big difference with wood stoves is that the possible heat output is almost unlimited, while the heat output of Pellet and Gas stoves is controlled by electronics. Wood Stove owners have been known to (wrongly) burn everything from particle board to trash and even certain flammable liquids. Some users even brag about how they made their stove “glow cherry red”! Wood Stoves themselves are not dangerous…rather the installation, operation and maintenance (or lack thereof) can make them so. With that in mind, we’ll try to lead you in the right direction regarding placement of your stove.
#1 Do’s and Don’t
DON’T INSTALL A STOVE DIRECTLY ON A FLOOR WITHOUT LEGS
DON’T CUT THE LEGS OR PEDESTAL OF A STOVE
DON’T BURN ANYTHING EXCEPT NATURAL 100% WOOD LOGS IN YOUR STOVE
DO READ YOUR OWNERS MANUAL AND TALK TO YOUR BUILDING OFFICIAL AND FIREPLACE PRO
DO FOLLOW ALL GUIDELINES AND CODES REGARDING YOUR MODEL
DO INFORM YOUR INSURANCE CARRIER ABOUT YOUR STOVE INSTALLATION
Listed and Unlisted Wood Stoves
Installation requirements are different for stoves that have been “listed”. A listed stove is one that has been examined by a recognized independent laboratory.
If your stove is listed, then it is a requirement that exact floor and wall clearances are specified in the manual. Often these specs are also printed on a metal label affixed to the stove. The good news is that most modern models of Wood Stoves are able to be put closer to walls than earlier models. While older stoves needed as much as 36”, newer stoves can be put as close as 6” to combustible walls with no additional protection needed. This is accomplished by the use of built-in heat shields and combustion designs which project the majority of the stoves heat away from the rear and side walls.
How Hot is Hot?
It would be safe to say that the labs fire up the stoves at a maximum rate – and then some! They then measure the temperature of nearby surfaces. One widely accepted standard states that no combustible surface should rise to more than 90 degrees F above the room temperature. In a 70 degree room, this means that no wall temperature should ever exceed 160 F. Wood does not ignite until 4-500 F although there is some evidence that wood which is constantly exposed to temperatures above 250F can eventually turn to charcoal and present an ignition danger. Keep in mind that certain “safe” temperatures can still cause certain finishes and paints to fail and/or woods and other soft materials to warp or buckle.
The Pipe is Important
Although your newer stove may have reduced clearances to combustibles, the stove pipe (chimney connector) often is the limiting factor. Single wall chimney connector usually has a clearance of 18” from combustible walls. This limitation can often be overcome by the use of special double wall interior piping or stove pipe heat shields, either of which can reduce the pipe clearance to as little as 9”.
All Floors Need Protection
All Wood Stoves, listed and unlisted, need protection on the floor. This is commonly known as the “hearth”. The exact type of protection varies depending on the design of the stove and how much heat is radiated downward. Listed stoves which have built-in bottom shields and convection chambers may need as little as 1/4” of ceramic tile beneath the stove. In this case, the floor protection is primarily to catch sparks which might escape during loading and cleaning. Other stoves need more elaborate floor protection. One listed model that we are aware of calls for no combustibles at all beneath their stove unless you use an optional bottom heat shield. This model can therefore only be installed on a concrete slab above bare earth!
Summary for Listed Newer Stoves
It is often possible to install newer Wood Stoves quite close to typical interior wall surfaces without installing any additional non-combustible wall protection. Double wall interior pipe and/or pipe heat shields can also allow your chimney connector to be installed closer to the wall. Check your owners manual for the specific instructions relating to your stove brand and model.
Older and Non-Listed Stoves
Is my Older Model Stove listed?
If your stove is older than 20 years, it is a safe bet that it is either not listed or that the listing has expired. In almost all cases, you should treat such a stove as an unlisted appliance and follow the general guidelines below.
Am I allowed to Install my Older or Unlisted Stove?
According to the NFPA (National Fire Protection Agency) and other codes and standards, it is permissible to install an unlisted appliance. However, your building official often has the final say in this matter. There are also certain states and localities where installing or using an older stove is not allowed due to the fact that such stove emit much more pollution than newer models.
Floor Protection for Unlisted Stoves (from NFPA 211)
Size: Floor Protection shall extend to at least 18” from all sides of the appliance.
Construction: The basic floor protection specified by NFPA applies to stoves with legs over 6” in height. This means that the floor of the stove combustion chamber should be at least this height above the floor surface. The standard calls for:
1. Closely spaced 2” thick masonry units (brick or cinderblock/patio block.
2. Top cover of 24 gauge sheet metal.
For stoves with legs from 2” to 6” in height, the standard calls for:
1. Hollow 4” blocks set on their side so that the ventilated spaces line up horizontally. The ends should remain open for proper flow of cooling air.
2. Top cover of 24 gauge sheet metal.
Of course, you could use thicker cinder blocks such as 6” or standard 8” if you desire to place the stove higher for easier loading and servicing.
It is this writers opinion that unlisted stoves with very short legs are dangerous and every effort should be made to extending the height of the firebox above the floor. Possible methods include the purchasing of longer cast legs, single bricks under each leg or other similar method. Always remember that maximum air circulation under the stove is the goal.

Floor Protection for Newer Listed Stoves
Listed stoves, meaning those which come complete with attached labels and clear instruction manuals, are to be installed using the floor protection specified by the manufacturer. This can vary greatly, from certain models that cannot be installed on anything other than concrete slabs over bare earth, to others that need just one layer of 1/4” ceramic tile or equivalent. The reason for such a wide variance of specifications is that no standard exists for floor protection. Instead, manufacturers tell the test lab exactly what is in the instruction manual and the lab uses these specs in the stove testing.
Some stove manuals are quite confusing. They give minimums and details using technical terms such as K factor (see our K-Factors Article), which is little help for the average person or contractor. If you are confused about the requirements for your stove model, contact the manufacturer and ask for some examples that would satisfy their floor requirements. You can then use these examples as a basis for your floor protection. Ask the dealer or manufacturer if they sell a bottom heat shield for your model – it will usually be worth the expense since it will save big on the floor construction.
It also helps to study your stove and apply some common sense. For instance, a stove with taller legs or pedestal, an ashpan and/or a bottom convection chamber is likely to produce much less downward radiation than another model with a single wall bottom that the fire burns directly on.
Do I need to provide extra support under the floor for the weight of the stove and hearth?
Not usually. Even though many stoves weigh in at 400+ pounds, the weight is spread by the legs and the floor protection. The combined weight of most systems is not much more than having 4 or 5 people standing in the same area. If you are doing extensive brick and masonry walls and floors you should have an experienced contractor take a look at the joists and posts in the basement or crawl space below. Some relatively simple buttressing will assure that the masonry does not settle and develop cracks.
NOTE: Never attempt to support a masonry chimney on top of frame construction. All such chimneys should have concrete foundations that are installed to code and below the frost line.
Wall Protection
A basic rule which applies at all wall protection is that the least expensive and best insulator is air. This is the reason that most wall protection needs to be installed spaced away from the combustible wall which it protects.
Wall Protection for Unlisted Stoves
As mentioned earlier in this document, most unlisted stoves should be installed 36” from combustible walls. This clearance can be reduced to as little as 12” with the proper wall protection. There are a number of standards relating to such wall protection, so be sure to ask your building official or stove/fireplace pro which are used in your area. One very popular standard is published by the NFPA – National Fire Protection Association (http://www.nfpa.org). This standard is known as NPFA 211, and contains a wealth of information on stove clearances. A sample clearance reduction guide and diagram are presented here as examples:
Clearance Reduction Table
Diagram of Sample Installation
An Example of clearance reduction from this code states that a piece of 24 gauge sheet metal installed on spacers 1” from an existing wall will reduce stove clearances by 66% – or from 36” to 12”. The clearance reduction is usually measured from the rear of the stove to the original combustible wall, not to the sheet metal.
Wall Protection for Newer Listed Stoves
Luckily for the newer stove buyer, most manufacturers have come to understand space limitations in modern homes. The result is that many – if not most – newer stoves are permitted to be placed much closer than 36” to combustible wall surfaces. Some models have additional heat shields that can be purchased which will allow even closer installation. Since each stove is different, you should consult the manual on your specific model. It would be wise to do this research BEFORE your purchase of a stove so that you can be assured your stove will fit your room and hearth design.
Ceiling Protection
Be careful when installing stoves in areas with low overhead clearance, such as basements and rooms with sloped ceilings. NFPA requires 48” from the top of a stove to a combustible ceiling. This can be reduced by use of proper protection. Some newer stoves call for less clearance – we’ve seen models which allow 3 feet and even less. As always, consult the manual for newer and listed stoves.
Alcove Protection
Older and unlisted stoves should not be installed in an alcove constructed of combustible materials. However, some newer stoves allow this installation and have tested their models specifically for this type of setup. This is another situation where it pays to do your research BEFORE selecting a stove model.
Pipe Protection
Stovepipe, also known as chimney connector, has to be a certain distance from both combustible walls and ceilings. One NFPA example calls for an 18” clearance to walls for 6” diameter stovepipe. This can be reduced by either:
1. Protecting the wall or ceiling adjacent to the pipe.
2. Installing an approve ‘Pipe Heat Shield” onto the stovepipe (reduces 18” to 9”)
3. Using special interior double wall stove piping, which can reduce the distance to as little as 6”. This pipe is usually manufactured by the same companies which produce Class A double wall chimney (Metalbestos, Excel, Duravent, etc.).
Once again, your stove manual, label or local professional is the best source of the exact specifications for your particular stove model.

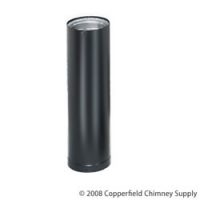
6INCH BLACK STOVE PIPE
Shop now and get a quality product produced on our own factory (no middlemen). Shop now and get the best prices
SHOP NOW
http://hearth.com/econtent/index.php/articles/wood_stove_clearances_installing_it_safely


