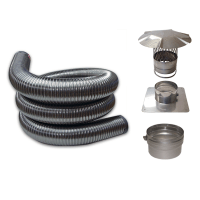
Installing Your Non catalytic Woodstove:
Improper installation of your woodstove can result in a house fire and cause greater pollution. If a stove isn’t installed properly, it can also affect the draft of the stove (i.e., ability to draw combustion air and expel exhaust). Proper draft is critical to reducing pollution and maintaining high efficiency. Before having your stove installed, be sure to check with local authorities regarding building codes and permits, and notify your fire insurance company. The following tips discuss the importance of proper installation.
What You Should DO:
DO have your woodstove professionally installed by a certified installer.
BECAUSE: A certified installer can determine the proper draft for your stove, make sure all the seals are tight, and ensure that your stove is installed with all safety measures in mind.
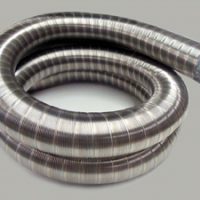
DO consult a certified installer about the need for a flue liner in your masonry chimney.
BECAUSE: Lining the chimney can help maintain proper draft and prevent icing, which can block your chimney.
DO use the manufacturer’s recommended flue diameter.
BECAUSE: An improperly sized flue will not provide the draft needed to operate the stove. Also, smoke may leak into your house through the air inlets without proper draft.
DO make certain that all seals connecting the stove to the flue, and within the flue, are as tight as possible.
BECAUSE: Tight seals will prevent smoke from leaking into your house and contribute to good draft.
Operating Your Non catalytic Woodstove:
Follow the procedures below to operate your stove for maximum efficiency and minimum pollution. What makes a new non catalytic woodstove burn efficiently and cleanly is “secondary combustion”-a feature that differentiates the new stoves from the older models. In new non catalytic woodstoves, the usual combustion process in augmented by a second area of combustion that burns off the smoke before it exits through the flue. In some stoves, the fire of secondary combustion is visible near the air inlets in the secondary combustion zone (it looks like a little jet of flame coming out of the inlets), and is called “light-off.”
What You Should DO:
DO burn only dry, Well-seasoned wood, not wet or freshly cut wood. Season wood at least six months; store outdoors, loosely covered, to allow air to circulate freely through the pile.
BECAUSE: “Green” or wet wood releases less heat because energy from the fire must first evaporate the moisture before producing useful heat.
DO build and maintain moderately hot fires quickly after loading the wood. Burn a new load at a higher air setting for about 5 to 15 minutes and then turn down the air supply to the desired setting. When adding new wood, the dampers should be opened to supply air directly to the wood and to the flames leaving the wood.
BECAUSE: Enough air must be supplied to completely burn the gases and resins from the wood. The rate at which the wood burns is related to the amount of air supplied to the wood. If there’s not enough air, the wood will not burn completely. High temperatures are necessary to achieve the secondary combustion that non catalytic stoves rely on to reduce pollution and improve efficiency.
DO use many small or split pieces of wood rather that a few large pieces.
BECAUSE: Small or split pieces (e.g., 2- to 5-inch diameter) ignite more quickly and create the hot fires that noncatalytic stoves require.
DO pay special attention to the instructions for using the secondary air controls. In some models, you can observe the secondary air inlets through the glass door to confirm that the inlets light-off.
BECAUSE: Non catalytic stoves require secondary combustion to burn cleanly and efficiently.
DO burn moderate to full loads of wood that will provide several hours of uninterrupted burning and minimize door openings.
BECAUSE: Minimizing door openings keeps the burn temperature high and sustains secondary combustion. Frequent door openings increase pollution both inside and outside your home.
DO operate the stove’s internal fans (if your stove has them) in strict accordance with the operating instructions. Some manufacturers recommend leaving the fans turned off for 30 minutes after start-up and refueling, and setting them on low for small fires.
BECAUSE: Fans remove heat from the fire; cooler fires result in more pollution.
DO reload the stove when the charcoal bed burns down to a 3 to 4 inch depth. De- ash the bed by stirring but don’t break up the charcoal or compress the bed.
BECAUSE: Heat from the charcoal will ignite the new fuel and help keep the temperatures high. Larger pieces of charcoal let air circulate and help the fire revive quickly.
What You Should NOT Do:
DO NOT burn freshly cut green wood, or kiln- or oven-dried lumber.
BECAUSE: The high moisture content of fresh wood hinders hot, clean burning. Kiln- or oven-dried lumber vaporizes too fast, leading to excessive pollution and creosote buildup, with its associated fire hazard.
DO NOT let the fire smolder at low heat.
BECAUSE: Hot fires (i.e., temperatures of 1000 to 1200F) are required to maintain secondary combustion and burn the pollutants in the smoke. Cool fires lead to more creosote buildup in your flue, requiring more frequent cleaning and creating a fire hazard.
DO NOT burn trash, treated wood, particle board, plywood, or other fuels (such as coal, kerosene, or lighter fluid) unless they are listed on your stove’s permanent label.
BECAUSE: Trash produces fly ash. Treated woods, particle board, and plywood contain chemicals that, when burned and inhaled, are hazardous. Burning other fuels may overheat and damage your stove.
Maintaining Your Non catalytic Woodstove:
What You Should DO:
DO check all gaskets annually. Repair or replace frayed, warped, or worn material. Broken glass (if your stove has glass windows) should be replaced immediately. Hints: One way to test the tightness of a gasket seal is to close the door on a dollar bill. Pull gently on the dollar bill. If it pulls easily out of place, the seal isn’t tight and the gasket should be replaced. Repeat this test in several locations to check the seal all around the door.
BECAUSE: Gaskets and glass windows in good condition will provide an airtight seal and prevent leaks. Leaks will reduce your stove’s efficiency and may create indoor air pollution problems.
DO check seams on cast iron stoves annually. Re-cement as necessary.
BECAUSE: As with gaskets, seams are areas where leaks can develop.
DO check the wood-loading door and the ash drawer for tightness; adjust as necessary.
BECAUSE: These two areas are subject to warp or worn gaskets. Poor fit may result in over-heating or may allow smoke to escape into the room.
DO check air controls to make sure that parts move freely.
BECAUSE: Pieces of bark, ash, or charred wood may become lodged in the sliding mechanisms. Exact amounts of combustion air are essential for your non catalytic stove to achieve high efficiency and reduce pollution.
DO check the secondary air holes for plugging; clean with a wire brush as necessary. Each week operate the stove in a “hot” mode for 30 to 45 minutes.
BECAUSE: Nozzles and secondary air holes must remain unclogged to maintain combustion airflow. When these become clogged, secondary combustion won’t occur. Hot fires will burn off the accumulated creosote that brushing can’t remove.
DO consult your owner’s manual for other periodic inspection tips on how to replace worn and broken parts. Replace firebrick and other insulating materials when you see crumbling or other signs of deterioration.
BECAUSE: Failing to replace a part will cost you more in the long run. For all models, parts should be available from your dealer.
DO check the baffle of your stove for warpage. Contact the manufacturer or your dealer if this occurs.
BECAUSE: The airflow within your stove will be distorted if the baffle is warped. This condition can be corrected by replacing the baffle.
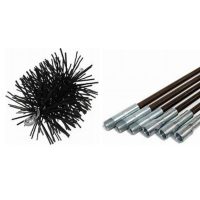
DO check the flue twice a month and have it cleaned at least once a year. After cleaning, check the seals and re-tighten joints in the flue and to the stove.
BECAUSE: Buildup of creosote on the flue walls can re-ignite and cause fires. Tight seals and joints prevent leaks.
DO make sure the thermostat (if your stove is equipped with one) is working properly; replace as necessary. Refer to parts list in your owner’s manual.
BECAUSE: A broken thermostat can prevent air inlets and dampers from opening or closing automatically.
What You Should NOT DO:
DO NOT remove or tamper with the preset operating or temperature controls.
BECAUSE: It’s against the law, it will void your stove’s warranty, and it will create a safety hazard. The stove will be less efficient and more expensive to operate. Thermostats control either primary or secondary air, or both. Tampering may ruin the precisely designed secondary combustion capabilities, resulting in lower efficiencies, higher operating costs, and greater pollution.
(This Page courtesy of U.S. Environmental Protection Agency)
Wood Heater Program (EN-341W)
U.S. Environmental Protection Agency

