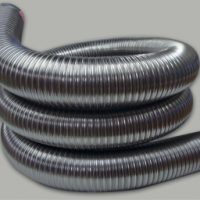
How to install a chimney liner
Preparing the liner for installation
Caution: Metal edges can be sharp, make sure to wear protective gloves when handling the liner and liner components.
Also make sure your chimney has been cleared of all debris before installing the liner.
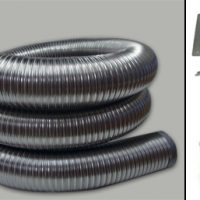
1. Remove the liner from the packaging and straighten it out on a flat surface.
2. Attach the bottom termination connector (tee or other appliance connecting device). Tighten the hose clamp on the connector to the liner. Do not over tighten.
3. Find the exact length of the liner needed by measuring from where the bottom termination will stop to the top of the chimney crown. Add one foot. Now cut the liner using a pair of tin snips. Be cautious as to not leave jagged
pointed edges on the liner. Make sure to leave a clean edge. (for safety reasons)
Insulating the liner (if required)
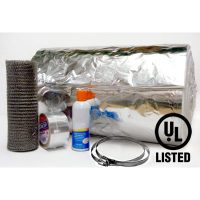
Using Insulating Blanket Wrap
1. Make sure the bottom termination connector is installed. The liner must be insulated all the way to the bottom of the connector.
2. Determine the length of insulation needed and cut.
3. The insulating wrap must overlap along its length by a minimum of 1 inch. To ensure you have the proper width of insulating wrap multiply the liner diameter by 3.14 plus 1 inch for overlap. You may trim the width of the insulation to this amount but is not necessary. If the overlap is more than 1 inch you may have difficulties with clearance.
4. With the foil side of the insulation facing the ground, lay it out on the ground.
5. Set the liner in the center of the insulation.
6. Begin wrapping the insulation around the liner leaving at least a 1 inch overlap on the seam. You can use the spray adhesive to help keep the insulation in place. Use the foil tape to secure the seam at 1 foot increments.
7. Once the insulation is in place lay one continuous vertical length of tape on the seam.
8. Now unroll the wire mesh and encapsulate the full length of liner including the bottom connector. Use one hose clamp to secure the mesh to one end of the liner. Now on the other end of the liner, pull the wire mesh until it retracts and fits tightly on the liner. Use another hose clamp to secure the mesh on the pulling end. Cut away excess mesh. You may take the stainless steel locking wire and spiral wrap the wire mesh to help keep it in place during installation .
9. The liner is now ready to install.
Installing the liner
1. Make sure you have the available manpower in order to handle the liner. Always make safety precautions when doing any work on the roof.
2. Some installations may require you to use a rope connected to a pulling cone or directly to the bottom connector.
A second person may be needed to pull the rope from the bottom of the chimney while the person on the roof guides the liner down the chimney.
3. Keep the liner centered in the chimney opening to avoid causing damage to the insulation and/or liner.
4. Once the bottom connector has reached the desired position. Cut the top of the liner. Add 4 inches to the height that is equal to the crown.
5. For longer lengths of liner exceeding 35 feet, it is recommended that the liner be supported. This can be done with angle iron supporting the bottom connector.
Completing the top termination
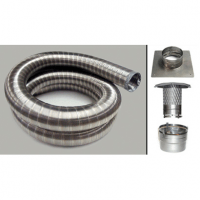
1. With the bottom connector held in place- put a heavy bead of silicone caulk around the chimney crown or top of clay flue tile. Place the top plate over the liner and press firmly into silicone caulk.
2. Tighten the hose clamp band around the liner. This secures the liner to the top plate. Optional: Top plate flashing has four pre drilled holes, which can be used to tap-con the top plate to the crown.
3. Install the cap by fitting it over the collar of the top plate. Tighten the hose clamp band of the cap onto the top plate collar. Your top termination is now complete.
Completing the bottom termination
1. Locate the point where the connector pipe will pass through the chimney to the tee body.
2. If insulated- cut away a hole in the insulation and mesh where the tee snout will connect to the body of the tee.
3. Secure the snout to the body of the tee using the attached metal band, which wraps around the backside of the tee body.
4. If insulated- wrap the snout of the tee with insulation.
5. Fill in the hole around the snout with brick and mortar.
6. Complete your connection to the heating appliance following all applicable codes.
Congratulations, you have successfully installed your stainless steel liner!

