Unlock a 15% discount on all products with the "15%OFF" discount coupon at checkout. Hurry, as the coupon limit is available—place your order now!

Do not buy until you talk to us! We can save you cash! 1-866-941-5112

An installation with a double wall Tee connection is an installation that goes horizontally through a wall then turns up vertically.  This is made possible with the use of the following parts of a double wall chimney.

The diagram below is your typical Tee installation.  This requires the double wall pipe to pass through a wall then into a Tee section to make the class A chimney vent vertically.

To be able to transition from the single wall black stove pipe from the stove into the Class A chimney double wall pipe you need a Black Snap-Lock Adaptor.  To cover over the twist lock end of the pipe, use the Finishing collar, this gives the double wall pipe a nice clean finish look.

Then the double wall pipe passes through a wall thimble.  The horizontal double wall chimney pipe then locks into the Tee.

This Tee is supported by a Tee Support. Then on top of the double wall tee, you can install lengths of the factory built chimney to the required height.  The lengths of the Class A chimney pipe will need wall straps, separated no more than 8′ apart, securing the double wall pipe to the house.

Once the Class A chimney double wall pipe extends above the roof you will need to use a roof bracket if the chimney extends more than 5′ over the last wall bracket or our of the roof flashing (if used).  This secures the factory built chimney to the roof.  Then to finish off the Class A Chimney installation with a tee , you install the rain cap on top of the factory built chimney.


    *Note: If you have a terra cotta clay chimney
    flue lining, be sure to measure the true length and width of the
    inside of your chimney flue space.

    *If there is a terra cotta clay flue liner, does it protrude out of
    the top of the chimney at least 2 inches? If there are at least 2
    inches and the terra cotta clay is in good condition, you will use
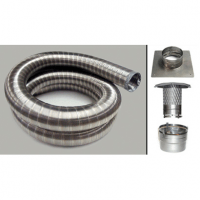
    our stainless steel, terra cotta top plate that has a 1 1⁄2inch edge
    that goes all the way around (like a shoebox lid).

    *If your terra cotta clay flue is in bad shape at the top, you may
    need to just take a hammer and tap all around that terra cotta,
    taking it away to make the surface flat at the top of your chimney.
    In that case, you will simply use the flat top plate that comes with
    our liner kit.


    *Note: If you have a terra cotta clay chimney
    flue lining, be sure to measure the true length and width of the
    inside of your chimney flue space.

    *If it is on the back of the stove, is it parallel with the back of the stove or is it at an angle, like 45 degrees?

    *If it is at an angle you will use an insert stove adaptor (an insert liner kit) rather than a two-part tee with cleanout cap.


    Usually pellet stoves have an exhaust hole id of 3 inches. However, if you are going up more than 15 feet to the top of your chimney you need to use a pipe and/or flex liner that is 4 inches diameter.


    If you are only venting a hot water heater then the exhaust hole diameter is probably 3 inch diameter. If it is 3 inch diameter and you are going up more than 15 feet to the top of your chimney, you must use a 4 inch diameter flexible liner or ridged pipe for proper draft. We also suggest to go ahead and use a 4 inch diameter flexible liner or ridged pipe even if the total length is 15 feet or less.


    Not the depth or any other dimension inside your fireplace.

    Most gas log fireplaces require an 8 inch liner kit or rigid kit. But do not assume that is the case for the gas log fireplace kit you are installing. Obey the requirements for that specific unit that are in your installation/instruction manual.

    THANK YOU FOR ANSWERING THOSE QUESTIONS

    NOW GIVE US A CALL AND SPEAK WITH ONE OF OUR TECHS

    866-941-5112