Call Now and Save!
1-866-941-5112
Let’s face it, your chimney is the most abused part of your home. There it stands tall above your home, left to battle wind, rain, heat and freezing temperatures.
Maintaining your chimney is the best DIY job you can accomplish. Crumbling mortar? Mortar repair, known as re-pointing, will help you avoid a much more costly problem down the road. Re-pointing is the treatment of joints between bricks, stone or other masonry components by filling with mortar; also, called tuck-pointing.
Tools Needed For Mortar Repointing
- Mortar Mix
- Jointing Tool
- Brick Trowel
- Soft Brush
- Container to mix cement in and hoe
- Grinder w/ tuck pointing attachment and blade
- Ladder or Scaffolding
- Mason Hammer and Chisel
- Pointing trowel
- Scraper
- Square mason trowel or board
Can I Prevent Damage to my Chimney?
Getting Started
Set up your work area before starting your job. Scaffolding or ladders should be properly set and if working on a high or extremely pitched roof, safety harnesses should be used.
Always work from the bottom up and work in small sections (a few feet or so). Start by removing the loose mortar with a mason’s hammer and chisel. For big jobs, renting an electric grinder may be more beneficial.
When all your loose joints are removed, spray down the area of the chimney that you just worked on with a hose to remove all loose debris and dust. Allow the chimney to dry so there is no standing water in the joints and the bricks are just damp.
Mix the mortar with a little more water than normal. Fill your pointing bag (you can buy one at the local hardware store) or load the bottom side of a square mason’s trowel (a board will also work) and hold it against the brick below the joint you are filling. Squeeze the pointing bag or take a portion of the mortar with a pointing trowel off the board and pack it into the joint. The mortar should flow freely and easily out of the bag, if not remix it with more water.
When your section of joints are full, with a brick trowel held flat against the brick, slice through the excess mortar and remove.
Each joint must now be compressed and shaped. By using a jointing tool, smooth each joint and remove excess mortar.
Continue to the next section until the job is complete.
When all the joints have set up, using a soft brush, clean the face of the brick.
Quick Tips
A couple hours after completing the job, go back over it with a stiff broom and remove any left over sand and/or dust.
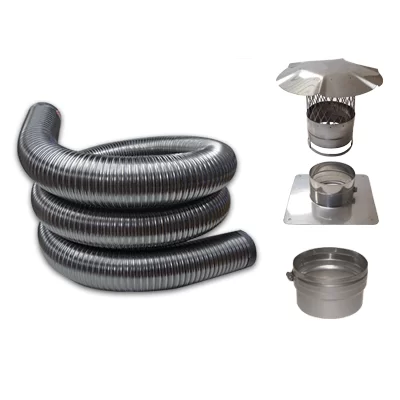
Most likely, crumbling mortar may have already damaged the inside of your flue beyond repair. If this is the case, a stainless steel chimney liner will give you and your family the peace of mind needed during the long heating months.