Unlock a 15% discount on all products with the "15%OFF" discount coupon at checkout. Hurry, as the coupon limit is available—place your order now!

Do not buy until you talk to us! We can save you cash! 1-866-941-5112

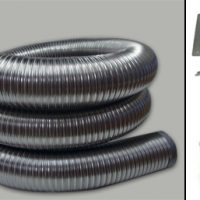
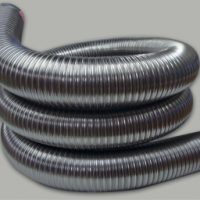
First thing is safety.  Make sure your roof setup is safe to work off of and always wear gloves dealing when installing flexible chimney liner.  It is very sharp.  Before you install the flexible chimney liner, you need to check inside the chimney for any possible obstructions and remove them first.

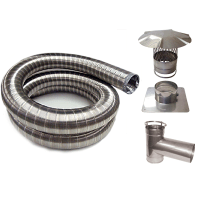
Then install the tee on the chimney liner.  Insert the chimney liner from the top down.  Some installations may require you to use a rope connected to a pulling cone. A second person may be needed to pull the rope from the bottom of the chimney while the person on the roof guides the liner down the chimney.

Avoid trying to push the liner down and force it, always try to twist and turn the liner and pull from the bottom.  Have a person on the bottom waiting with the snout of the tee. You need to communicate with each other and line up the hole on the tee with the snout.  The most important part here is that the lips of the tee body are 100% inside the snout.  Once they are in tighten the band and you are done on the bottom.

Installing Flexible Chimney Liner Video

The top can now be finished.  Install the top plate with a bead of silicone on the bottom.  Pull up on the liner to remove any slack and tighten the band on the top plate. After the top plate is installed you can cut the extra chimney liner.  You can use a hack saw, tin snips or an angle grinder to cut off the excess chimney liner.

Now install the rain cap.  The rain cap slides over the collar on the top plate and secures with a band clamp.

Now that the liner is all set and will not move anymore, you can fill in the gap between the snout on the liner and the masonry wall.  You can use small pieces of brick or special insulation designed for this application.  Then cover it with mortar or refractory cement.


    *Note: If you have a terra cotta clay chimney
    flue lining, be sure to measure the true length and width of the
    inside of your chimney flue space.

    *If there is a terra cotta clay flue liner, does it protrude out of
    the top of the chimney at least 2 inches? If there are at least 2
    inches and the terra cotta clay is in good condition, you will use
    our stainless steel, terra cotta top plate that has a 1 1⁄2inch edge
    that goes all the way around (like a shoebox lid).

    *If your terra cotta clay flue is in bad shape at the top, you may
    need to just take a hammer and tap all around that terra cotta,
    taking it away to make the surface flat at the top of your chimney.
    In that case, you will simply use the flat top plate that comes with
    our liner kit.


    *Note: If you have a terra cotta clay chimney
    flue lining, be sure to measure the true length and width of the
    inside of your chimney flue space.

    *If it is on the back of the stove, is it parallel with the back of the stove or is it at an angle, like 45 degrees?

    *If it is at an angle you will use an insert stove adaptor (an insert liner kit) rather than a two-part tee with cleanout cap.


    Usually pellet stoves have an exhaust hole id of 3 inches. However, if you are going up more than 15 feet to the top of your chimney you need to use a pipe and/or flex liner that is 4 inches diameter.


    If you are only venting a hot water heater then the exhaust hole diameter is probably 3 inch diameter. If it is 3 inch diameter and you are going up more than 15 feet to the top of your chimney, you must use a 4 inch diameter flexible liner or ridged pipe for proper draft. We also suggest to go ahead and use a 4 inch diameter flexible liner or ridged pipe even if the total length is 15 feet or less.


    Not the depth or any other dimension inside your fireplace.

    Most gas log fireplaces require an 8 inch liner kit or rigid kit. But do not assume that is the case for the gas log fireplace kit you are installing. Obey the requirements for that specific unit that are in your installation/instruction manual.

    THANK YOU FOR ANSWERING THOSE QUESTIONS

    NOW GIVE US A CALL AND SPEAK WITH ONE OF OUR TECHS

    866-941-5112