Unlock a 15% discount on all products with the "15%OFF" discount coupon at checkout. Hurry, as the coupon limit is available—place your order now!

Do not buy until you talk to us! We can save you cash! 1-866-941-5112

Installing a chimney liner for a fireplace insert can be  difficult with out the right parts and knowledge.   Many times you will be using a 6″ chimney liner and sometimes an 8″ chimney liner.  Almost always you will have to do some modification to get the liner thru the damper area of the fireplace.

The best thing to do is remove the damper and possibly a few bricks or part of the metal fireplace to allow the chimney liner to pass thru round to connect to the fireplace insert.  This will give you the best draft, keeping the liner round.  If you think this option is beyond your skill level or there are other reasons you do not want remove the damper housing, you can slightly oval the chimney liner.  The Flex king can be ovaled at home and made round again with your hands to use the round components that come with the chimney liner kit.  The Flex King Pro cannot be made oval with your hands with out damage, it needs a special machine to oval the liner.  It is available just ask your sales representative.

There are other issues you may have installing a chimney liner for your fireplace insert.  You may need to use an offset box, or an insert boot if you do not have a round flue outlet on the stove, or possibly an adjustable elbow on the end of the chimney liner.offset box insert

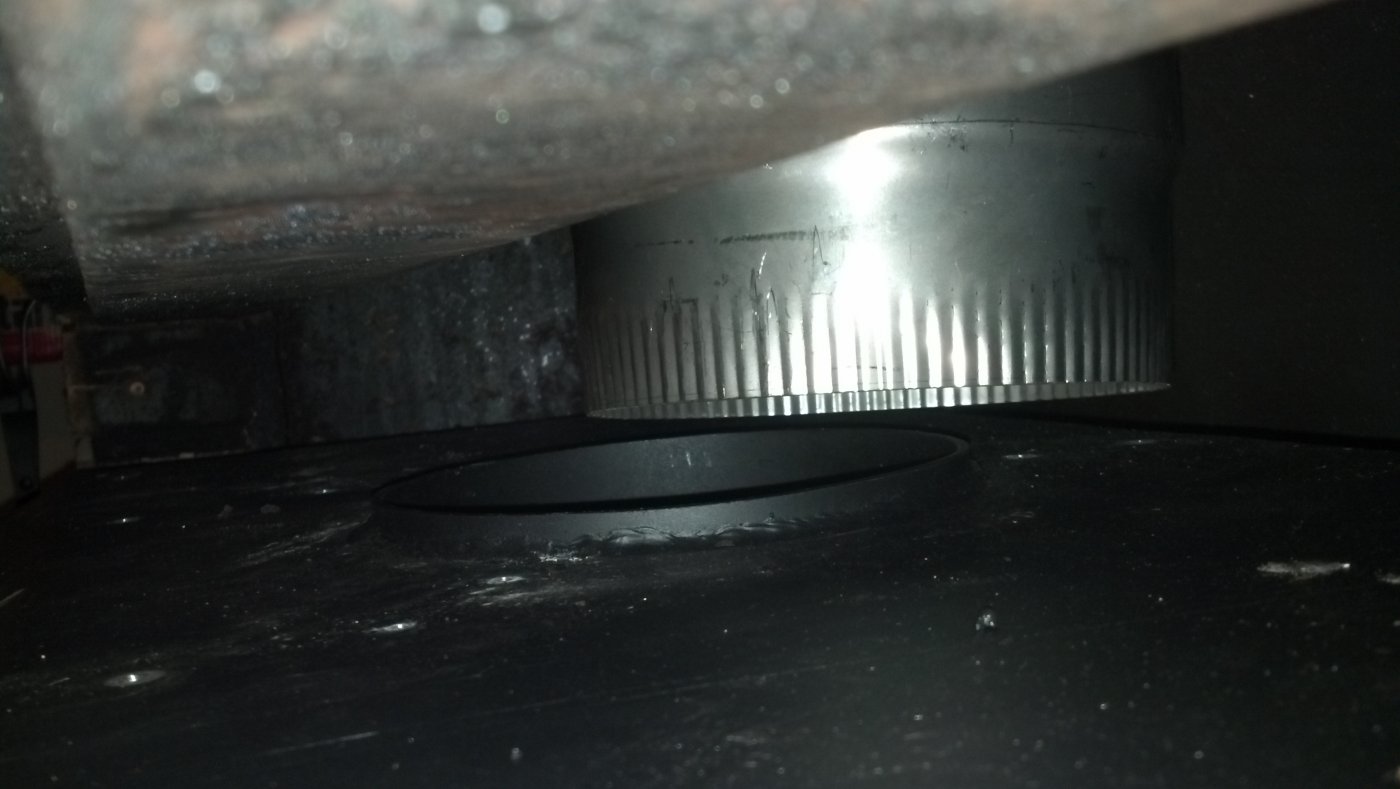
As seen above, the liner will need to come all the way down into the the top of the stove.  This specific install will require an offset box to complete the chimney liner installation.

Please contact us if you have any questions before purchasing.


    *Note: If you have a terra cotta clay chimney
    flue lining, be sure to measure the true length and width of the
    inside of your chimney flue space.

    *If there is a terra cotta clay flue liner, does it protrude out of
    the top of the chimney at least 2 inches? If there are at least 2
    inches and the terra cotta clay is in good condition, you will use
    our stainless steel, terra cotta top plate that has a 1 1⁄2inch edge
    that goes all the way around (like a shoebox lid).

    *If your terra cotta clay flue is in bad shape at the top, you may
    need to just take a hammer and tap all around that terra cotta,
    taking it away to make the surface flat at the top of your chimney.
    In that case, you will simply use the flat top plate that comes with
    our liner kit.


    *Note: If you have a terra cotta clay chimney
    flue lining, be sure to measure the true length and width of the
    inside of your chimney flue space.

    *If it is on the back of the stove, is it parallel with the back of the stove or is it at an angle, like 45 degrees?

    *If it is at an angle you will use an insert stove adaptor (an insert liner kit) rather than a two-part tee with cleanout cap.


    Usually pellet stoves have an exhaust hole id of 3 inches. However, if you are going up more than 15 feet to the top of your chimney you need to use a pipe and/or flex liner that is 4 inches diameter.


    If you are only venting a hot water heater then the exhaust hole diameter is probably 3 inch diameter. If it is 3 inch diameter and you are going up more than 15 feet to the top of your chimney, you must use a 4 inch diameter flexible liner or ridged pipe for proper draft. We also suggest to go ahead and use a 4 inch diameter flexible liner or ridged pipe even if the total length is 15 feet or less.


    Not the depth or any other dimension inside your fireplace.

    Most gas log fireplaces require an 8 inch liner kit or rigid kit. But do not assume that is the case for the gas log fireplace kit you are installing. Obey the requirements for that specific unit that are in your installation/instruction manual.

    THANK YOU FOR ANSWERING THOSE QUESTIONS

    NOW GIVE US A CALL AND SPEAK WITH ONE OF OUR TECHS

    866-941-5112